Wednesday, May 20, 2020

NSDC Evidence

In my NSD Contract, I have highlighted the titles that described the things I wanted to learn while undertaking a project of Installation and commissioning of IP CCTV Cameras and  Bio metric Access control, because it is my area of interest and I want to see myself in this field and do progress in upcoming future. While maintaining a blog and performing installation and commissioning of the devices, I have jotted down all the essential information, I have gained by learning  through plethora of online and offline sources. In the table below, I am explaining how I am providing the evidence of the things learned:

1. To gain valuable skills in Networking: 

Though I was a complete beginner with the networking field, I needed to learn a lot of concepts right from the beginning. Hence, I started reading some books on networking to gain that knowledge and complied the information gained in my blog under Networking section. The books I read for the same are referenced accordingly. I followed three books: Bruce Hallberg's, Networking: A Beginner's Guide; Joe Habraken's, Home wireless networking in a snap and finally, Douglas E. Comer's Computer Networks and Internets. 

2. To understand the fundamental concepts and principles behind Home Based Security Systems: 

I have carried out independent research through books, online resources and user manual to understand the working of Home security systems. I have individually learned the configuration of different devices like IP CCTV Cameras, NVR, HDD, Bio metric Access Controller and posted the details of them in my portfolio along with the steps I followed to make my project successful. Apart from this I have also did some R&D on the product to get the best out of it and explained it at Installation section.
 
3.  To adhere to the safety guidelines of the products while using them:

While working with the electric appliances, there is always a risk of accidental fire or short circuit or simply an electric shock. I have followed all the warnings, cautions and notices to minimize it. Therefore, now after completing the installation and commissioning, I can happily say that I am Safe and sound without any such accident.

4. Installation and commissioning: 

While doing the project, I had to do installation and commissioning of all the devices properly  ensure the proper functioning of the whole set up. Initially, when I started the project, there were a lot of confusions in my mind; however, by doing thorough study and researching I gained a lot of confidence and finally my end project is the evidence that majority of my confusions are now cleared and I can do this in future as well with ease. Under the installation section, I have put the links to explain the detailed working of each and every device.


With this, I am finally wrapping up my project but the things I learned while performing it will stay with me forever.

I also want to say thanks to the professors to guide me properly and always extending an helping hand whenever needed. The continuous feedback you provided, motivated me to make the project successful. 

Thanks.   


Tuesday, May 19, 2020

Network Security

As the network nowadays is very vulnerable and can be easily hacked, few settings in the NVR can avoid these mis-happenings to a large extent and make the network safe, sound and secure. The settings are explained below:

1. Disabling SADP (Search Active Devices Protocol) Services: These services allows third party software to search the active devices within the network. Just by clicking the search option, all the active IPs are displayed on the screen, once the IP is known any person having network knowledge can alter the device settings by accessing it through its IP address. Hence, disabling these services can secure the network and even if the intruder is an insider or outsider, he/she will not get access to the device to do any alteration. It can be done by un checking Enable SADP option in the system service under System option.

2. Setting HTTP Authentication: To enhance the access security, the HTTP feature, which is enabled by default can be disabled from the GUI or the Web Browser by un checking it or after enabling HTTP, the HTTP Authentication type can be selected as the digest  from the drop-down menu. Digest authentication type is used by a web server to negotiate the credentials with the user's web browser, and is also used to confirm the user's identity before sending any confidential information to them. Hence, it will save the network from any unauthorized access.

3. Setting RTSP Authentication: It stands for Real-Time Streaming Protocol and is used in entertainment and communication systems to control media streaming, which is enable by default. However, similar to HTTP authentication, it can be set as digest to secure the main stream data of the Live view from external access.

4. Managing ONVIF (Open Network Video Interface Forum) User Accounts: It is a global forum that developed an open standard for IP based Security products. Here, all the global IP devices can be connected with each other by enabling it, which is posing a threat to the security of the network. Hence, the ONVIF access management option allows the user to add only recognized user interfaces with unique passwords to access the video data. User levels like Media User, Operator or Admin can be selected to give authorization to them to access the media.

5.  Managing IP Camera Activation: While activating the device for the first time, an IP Camera activation password is already set. However, it can be managed again to enhance the system security, but even to make the change, it will require permission and by entering admin password and applying the changes, it can be changed into a new strong password and saved for future changes.

6. Passwords Change: Almost all the cameras sold today have a Graphic User interface having a default user name and password, that can be easily guessed and if the hacker has the network access, it will make the system more vulnerable. Hence, it must be changed to a long and strong one. Setting a schedule to change the password is advisable.

7. Disabling Port Forwarding: As majority of customers nowadays expect Mobile access of the Cameras, a lot of ports are forwarded to make it happen, which eventually exposes the NVR to the internet and by using the malicious exploits, the access can be obtained with is potentially Very dangerous. Hence, avoid connecting the server to the internet, if unavoidable, port forward as few ports as possible.

8. Enable firewall protection: The network device should have a firewall for protection while connecting the server to the internet. However, understanding the rules associated with the firewalls is a very complex process. Hence, its advisable to assign a professional to do this task.

9. Understanding Network Topology: Connecting the security system to the main network creates a doorway for hackers to not only enter the network through the surveillance but also the physical security system to the network. Hence, it is advisable to place the security camera on the network other than the main network.

10. Encrypting Connection and video: Both connections and videos used by some NVRs are not encrypted with SSL or equivalent and hence, choose the vendors wisely who encrypts both and provide maximum security. This gets maximum, when used in mobiles, but, setting high quality passwords can save it from external threat.

11. Securing physical access to network devices: By providing secure access controllers to the server rooms, both the network protection and thefts with in the organizations can be stopped.

12. Updated Video Recording Software: The software used should be updated regularly with the latest updates along with the security patches. If any security breaches appears, contacting the vendor straight away can reduce the risk and save the network for the future.

13. Avoiding Remote Access from public Wi-Fi: Restricting the SSID to broadcast and enabling the WP2A security encryption for on-site installation can save the network from outside threats.

14. Creating unique IP addresses and subset: Individual departments on individual subnets can improve security by preventing network devices to connect directly to other segments or alternatively, all the wireless clients can be placed on a single subnet to restrict hackers to break into the system.

Monday, May 18, 2020

Installation of NVR


For this project, I am installing a 4 Channel NVR of Make: Hikvision, Model no: DS-7104HQHI-K1. It is a compact model 4 channel NVR with one Audio port. On the front panel, it has 3 LEDs denoting Power, HDD and Network in sequence.


In the Rear panel, it has various ports and each port has its unique function. There are 4 Video input ports (Supporting 4 Cameras at the same time), 1 HDMI (For display purpose), 1 VGA (For display purpose), 2 audio ports one for IN and other for OUT, 1 LAN (to establish Ethernet connection) and 2 USB Ports (typically used for mouse input) and at the end, ground and DC port (that allows Power to pass).


Getting Started:

To start up the device for the first time, few steps are needed to be followed.

1. Start the device by connecting it with the power supply of 12 V DC and connect it with the screen to get the view of the installed NVR by using HDMI or VGA Cable.

2. To ACTIVATE the device for the first time, admin password needed to be set by entering the new password in Create New Password and then confirming it. Following this, in IP Camera Activation Option, a different password was entered that allowed me to activate and connect IP Cameras with it.


3. Finally, I pressed OK to save the passwords.

4. I even set some security questions and answers to reset the password in the future.

5. For device login, an unlock pattern is also set in the beginning twice and confirmed. While logging IN in any device, the pattern need to be entered.


These are One time steps only, that are used for NVR configuration and during its remote and Live access.

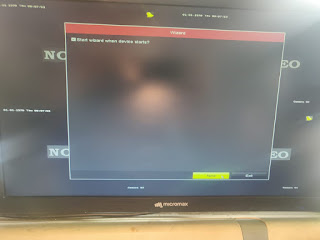
Then, the device automatically navigate to quick basic settings wizard where firstly, the Date, Time and Language of the NVR is Set.


After that, by clicking next, Network Setup wizard window appears, where the Enable DHCP option is Checked and after that, the NVR will automatically pick an available IP address and assign it to the NVR or alternatively, an IP address is inserted manually. Here, I have enabled the DHCP and allowed the NVR to pick any IP automatically.


After configuring the network parameters and clicking next, I was navigated to HDD Management window. As I have already inserted the HDD in the NVR, its status was displayed on the screen, I selected my HDD and clicked on Init, it removed all the previous data saved in the drive and the selected HDD was ready for saving the recordings. It will again prompt if want to save continuous recording or Motion detection.


After that, Camera Setup interface is displayed to add the IP cameras. By clicking Search, the NVR will start searching for all the available Cameras with their IP address, Then selecting the Camera and pressing ADD, the cameras will be automatically added in the NVR.


The next window shows the platform access, which can be enabled for Hik-Connect settings and next button is clicked which navigate straight towards the change password option, where previous passwords can be erased and new admin password can be saved if required and OK is clicked at the end to close the startup set up wizard.


After following all the steps in the startup set up wizard. The Cameras are ready to give the Live view and these basic settings are enough to configure the NVR. However, there are also a lot of other options in the NVR that can be modified and used according to individual's choice.


Settings of NVR:

After completing the startup wizard and right clicking on the screen with the help of a mouse, Main menu is opened which has 10 different sub-options for different purposes.


1. Play Back:

In this option, the previous recorded video and audio files can be checked simply by inputting the time and date and after clicking OK. The video clips will be displayed in the screen, by clicking on the desired video, the previous recording will be played and the activities during that time can be monitored. It also has various options like Instant Playback (to play recorded video of last 5 minutes); Normal video can be played by selecting the cameras and a date in the calender); Smart playback mode allow users to analyse the video containing some smart features like motion, or detecting intrusion by marking it in red color and playing the video. Here, rules can be set by selecting the areas and detecting any intrusion or motion near that specific area. It also gives custom search options for searching the files of an exact time, status, tag, sub-periods, logs, event type and so on, the searched video can then be played. From this option, Video clips can also be exported to a local storage device and the video backup can also be taken. It also allows Digital Zoom to zoom In or Out of image.


2. Export:

Allows searching and exporting all files with detailed conditions like time, camera name, Tag, File status, Event type or plate number. Files can also be exported for backup purposes using USB devices. Apart form this, to search and export files with human involvement, Human body detection functions should be configured, and by selecting Time and Camera, human motion during that time will be displayed. The human files exported, can also to exported using the USB devices. Similarly enabling Vehicles detection function allows user to search and export the files where vehicles are involved and the files can be backed up externally. The history of searched options can also be saved under search conditions and by clicking a search condition the related files can easily be searched.
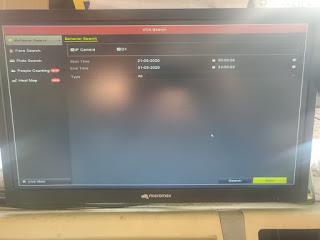


3. VCA Detection:

This feature works when the cameras installed have the provision of VCA Detection and these are configured earlier. Once the cameras are configured various features are supported by the NVR like Face search, human body search, vehicle search, counting people and Heat Map (Graphical representation of the area with maximum human stay and visit). However, for these, cameras used should support the VCA detection ant the camera I am using here is a basic one, so these features will be unavailable.


4. Manual:

Under manual option, their are three sub sections like Record, Alarm and manual video Quality. All the given options allows the user to manually do changes like setting schedules for recording as well as the manually selecting alarms in specific situations or altering video quality to get the best videos according to the requirement of the end user. 


5. HDD:

This option allows the internal HDD installed within the NVR to save all the recordings within it and also allows the user to take back up from the storage drive. In the beginning, under the storage device option, the HDD inserted is searched and by selecting it and pressing add, the HDD is selected for local storage. Some NVR's give multiple drives options to save the recordings. However, my NVR support only one HDD. The cameras can be selected to record or capture the view on HDD group. The advanced mode gives the user option of allocating the quota for the storage.


6. Record: 

It allows to set the recording parameters, there are two options, one is for Main Stream, which refers to the primary stream where the data is recorded in the HDD with higher resolution and FPS (Frames per Second) enabling H.264 + mode, the user will get higher video quality with reduced bitrate; and the other One is Sub-stream, that is suitable for live view in smart phone applications and consumes less internet bandwidth. Picture quality can also be altered to save storage. Moreover, there are plethora of other options like recording setting, making schedule, Motion detection, event or alarm triggered recording, Holiday recording and more for users to alter the settings according to their requirement.


7. Camera:

Here, the connected cameras are managed to make it work with the NVR. First thing here is to add the configured IP cameras within the NVR that can be done both automatically or manually. For auto option, in IP camera interface, search is clicked to search the available IP Cameras and then by selecting it and clicking add the cameras automatically configures with the NVR, whereas, the other option is to manually add the IPs of the Cameras with ONVIF protocol, Management Port 80, Transfer Protocol Auto and entering the User Name and password and finally clicking Add to manually adding cameras. Apart from this, in more settings H.264 Auto switch configuration is opened from the taskbar  and it is checked as enable H.265 (For initial access). The cameras can also be upgraded remotely by selecting the firmware upgrade file from USB drive, then the caeras will reboot automatically after the completion of upgrades.


8. Configuration:

Allows the user to manage its system from general to crucial ones. 

In general, basic date and time settings are there. 

Apart from this, event and alarm settings are done under this section, where Audio warning alarms are selected under Linkage action, so that the system gives alarm and alert the user if any unusual event like motion detection, video tampering, video loss, sensor alarms, exception alarms, human body detection, face detection, vehicle detection, line crossing, intrusion detection occurs by enabling audio output. It also notifies the remote alarm host when an event occurs. 

It can also be linked with the Email to send the alert messages when any event occurs like sudden scene change, unattended baggage, region entrance, object removal detection, Audio exception detection, defocus detection. 

Moreover, most crucial ones here is network settings which include TCP/IP Settings, which must be configured properly  before operating any device over the Ethernet where IP of the NVR is set ro access it on LAN network. To allow remote access of the cameras other settings are also there like DDNS where an server address is allocated to that NVR under DynDNS (like student.dyndns.org), which can be used to get the access of the camera at any remote location. Except this, Hik-connect is a service platform to access the connected devices through mobile application, that must be enabled and a verification code is created, after that, server address is inserted like student.hik-connect.com; if the Custom and Enable stream Encryption is enabled, The same verification code will be needed to get the Live view and remote access. Sometimes Ports need to be configured for remote access like Alarm host port (7200), Server port (8000), HTTP port (80), RTSP port (554). These are the default ports and should be identical in both the NVR and the software to get the access of the cameras remotely. User accounts can be managed in system management option.

As the name suggests, Live View gives the Live View of all the installed cameras. it has various sub options with different functions. Here I am highlighting only the crucial ones like Digital Zoom: that allows zooming of the live view in different proportions from 1 to 16X; Target Detection: It can be used  to detect the face, vehicle or human body and its motion during the last 5 seconds and 10 seconds afterwards. Historical and real time analysis can be selected to obtain the results. Out of all the list displayed, the desired video can be checked by clicking it. Its parametres can also be configured according to user's requirements from Live View Settings option. Apart from this, two other options are Live view Layout (where the video Out interface and window division can be set) and Auto-Switch of Cameras (which allows user to select display mode while taking a Live View along with setting a dwell time to automatically switch between the cameras after that time). 


This is the most complex option with various options for different purposes.

9. System Maintenance:

Finally, there are some system maintenance settings that should be done to ensure the network safety and checking if the system is working properly or not. First is, Storage device maintenance, which includes Disk clone, S.M.A.R.T Detection (HDD self evaluation), Bad sector detection and HDD health detection. Then, Searching and exporting Log files; importing and exporting IP Cameras configuration files, device configuration files: to check all the settings altogether. Then, upgrade System, where the latest firmware can be updated by USB drive or FTP or online downloading. Finally, restore default settings (that will restore the NVR to the default settings).


10. Shut down:

This is the last option of the main menu, and as the name suggest, like it is used for three purposes Log out (To logging out of the main menu) or shut down (To shut it down) or Reboot (Restarting the DVR.


These are the settings of the NVR with different purposes and can be altered according to the requirement of the user to make the system User friendly.

For remote access, the cameras can be viewed on the web browser just by typing the server address assigned above in network option under the configuration tab, on the address bar like student.Hik-connect.com (Free access) or any DNNS domain name (It is Paid)


In Mobile, the Cameras can be viewed through iVMS4500 app. Firstly, the app is installed in android or iOS. Once installed, from the main menu a new device is added simply by scanning the QR code present in the bottom of system maintenance option. The desired settings will be automatically entered and just by entering the User name and password of the device. The system can be accessed remotely.


This, concludes the complete Installation of the IP Cameras with NVR.


Monday, May 4, 2020

References

Habraken, J (2006), Home Wireless Networking in a snap, 4th ed, Sams Publishing

Comer D (2015), Computer Networks and Internets, 6th ed, Pearson Education Limited

Hallberg B (2014), Networking- A Beginner's Guide, 6th ed, Mc Graw Hill Education.

Realtime Biometric Co., Ltd. 2016, Biometric Machine T60, viewed on 10 March 2020, available at <http://realtimebiometrics.com/pdf/13.pdf>

Realtime Biometric Co., Ltd. 2016, Realsoft access control system solution, viewed on 10 March 2020, available at <http://realtimebiometrics.com/solutions/realsoft-access-control-system-solution>

Realtime Biometric Co., Ltd. 2016, Realtime Biometrics software, viewed on 10 March 2020, available at <http://realtimebiometrics.com/software>

Realtime Biometric Co., Ltd. 2016, Realtime attendance cum access controller, Viewed on 15 March 2020, available at <http://realtimebiometrics.com/product-cate.php?categoryID=3&title=Realtime%20Attendance%20Cum%20Access>

Zhejiang Dahua Technology Co., Ltd. 2017, IP Camera User Manual, Viewed on 10 April 2020, available at <https://dahuawiki.com/IPCamera>

Zhejiang Dahua Technology Co., Ltd. 2017, Camera Troubleshoot, Viewed on 18 April 2020, available at <https://dahuawiki.com/CameraTroubleshoot>

Hangzhou Hikvision Digital Technology Co., Ltd. 2018, Network video recorder user manual, viewed on 1 May 2020, available at <https://www.hikvision.com/mtsc/uploads/product/accessory/UD10628B_Baseline_User_Manual_of_Turbo_HD_Digital_Video_Recorder_V4.1.10_20180620.pdf>

Dns Stuff 2019, IT Pro Guide to the Most Common Network Troubleshooting Techniques and Best Practices, Viewed on 15-February 2020, available at <https://www.dnsstuff.com/network-troubleshooting-steps

Drako D 2020, 12 Security Camera System Best Practices, Eagle eye networks, viewed on 18-May-2020, available at <https://www.een.com/security-camera-system-cyber-best-practices/>

IC0, 2014, CCTV Code of Practice, ic2cctv.com, viewed on 18- May 2020, available at <https://www.ic2cctv.com/wp-content/uploads/2017/04/iC2-12-ways-Cyberattack_V2.pdf>

Online Image, Protect your home, accessed 14th February 2020, available at <https://www.protectyourhome.com/blog/home-security-equipment/how-home-security-systems-have-changed-over-20-years>

Online Image, ISP- Internet Service Provider, accessed 20th February 2020, available at <https://networkencyclopedia.com/wp-content/uploads/2019/08/isp-internet-service-provider-definition.jpg>

Online Image, Network devices, accessed 21st February 2020, available at <https://networkustad.com/2019/05/27/network-devices-hub-switch-router/>

Online Image, Ethernet Cables, accessed 25th February2020, available at <https://www.cmple.com/cat5e-bulk-ethernet-cable-24awg-cca-350mhz-1000-feet-blue>

Online Image, Network Topology, accessed 27th February 2020, available at<https://www.dnsstuff.com/what-is-network-topology>

Online Image, Remote control and node, accessed 28th February 2020, available at <https://www.globalspec.com/reference/42001/203279/the-main-differences-between-remote-control-and-remote-node>

Online Image, VPN- Virtual Private Networks, accessed 28th February 2020, available at <https://en.wikipedia.org/wiki/Virtual_private_network>

Online Image, Dahua 2 MP Dome Camera, accessed on 14 April 2020, available at<https://www.amazon.in/Dahua-2MP-Dome-Camera-IPC-HDW12B0SP/dp/B07PMKCH4D>


NVR over Router setup using POE (Power Over Ethernet) Switch

There is a specific way, by which all the devices used in the project are connected to make it work. Below I am sharing the connections of all the devices used like NVR, IP Camera, Router and POE Switch, that clearly defines, how connections are made and which ports are used keeping in mind the networking concepts. 


Connection Diagram of IP CCTV

Following the diagram, I have collected all the devices together using LAN Cables and also giving DC power individually to all the devices. Here, the devices connected from left to right are Router, PoE Switch, NVR, Camera.


Lets start one by one: 

1. Router: 

Here, I have used a 4 port Router of Make Tenda. Firstly, I gave it a 9 V 1.0 Amp DC power supply to switch it ON and in WPS port , I connected the network cable with internet connection, for this I have used the operator of Virgin media. Then from one out of the four ports present in it, I connected it to the up link port in the PoE switch, that transfers the Ethernet signals into the switch to distribute it in other Cameras and NVR.


2. PoE Switch: 

Here, I have an 8 port switch of make Advik. Then. I gave it power using a 48 Volt  5 Amp adapter from the front panel. It uses more power because it give Power as well as Ethernet signals to both DVR and Cameras. Hence, requires more power than other apparatus. Then in the back panel, in up-link port, I had connected it with the router by using a 0.5 Mtr Patch cable. Then the switch distributes the power and Ethernet network to the Camera and NVR, which are connected with the switch through CAT6 Network Cable. Here, Out of the 8 ports of the switch, two are used one is for camera and other is for NVR; Rest of the ports can be used to connect more cameras or switches.


3. Network Video Recorder (NVR):

The NVR used is a 4 Channel NVR of the make Hikvision that can support upto 4 Cameras. It is connected with the switch through its LAN port. As my NVR is not PoE enabled. Hence, I am providing an external power supply to it of 12 V 2 Amp. Otherwise, I did not had to add an adapter to it because PoE switch can send both Power and Ethernet signal to the NVR. To connect it with the Switch, CAT6 Network Cable with RJ 45 connectors at both the ends are used to establish a connection.


4. Camera:

Finally, I am using a Dome shaped IP camera for Indoor of Make: Dahua. It has two ports: one is for DC power supply and other is for network inpit. As this camera is PoE enabled, hence, only by connecting switch with the camera through the network cable both power and network signal can be sent to the camera. Where as, if instead of PoE switch, normal switch was used than a local supply should have been needed to supply power and just by inserting the network cable from NVR to Camera, the camera can be accessed. 


Like this, the connection of the devices are made and then the final step is to configure the DVR with all the apparatus.

Installation of HDD (Hard Disc Drive) in the NVR


After the configuration of Camera, the next step is to insert a Hard Disc Drive (HDD) into the NVR. In my project, I have used a 500 GB Green Surveillance HDD of Western Digital to save the recordings of the Cameras into the NVR.  I specifically used this HDD, because it is different form the normal external HDD used in computers. This is surveillance HDD, which is specially made for 24X7 operation as the CCTV works 24X7 and it is built to prevent damage due to overheating problem which is normal in external computer HDD.

Below I am explaining the steps I followed to install it for recording purpose.

First image shows, the NVR of Make Hikvision, which I am using. It has three LED lights that indicates the Power, HDD and LAN connection with it. 


After that, I placed it upside side to remove the screws around its four corners and removed it.


Then again, I removed the outer housing, and the NVR looked like this from inside, where I palced the HDD of WD and connected it with the PCB(Printed Circuit Board) present inside the NVR through two cable one Blue one to transfer data, which is also called as SATA (Serial advanced technology advancement) Cable and an additional SATA conversion cable which is of three colour Red, Yellow and Black, as shown in the image, thats helps in converting SATA into some other connection type. Here it is used for Power, Whereas the blue SATA is for transferring DATA to and from the NVR. The same cable is also used in computers for saving and extracting the data.


Finally, I secured the HDD by using small screws around its four corners. 


Now, the installation of HDD is complete. And the removed outer housing is again placed back and the screws are again tightened with the HDD inside.